Today we will show you how to create your own custom tab and add commands to that tab. We also show you how to back up your custom tab, reset the ribbon tabs to their default state, and import your backed up custom tab. We are using Microsoft Word 2016 in our example, but this procedure will also work in other applications like Excel, PowerPoint, and Outlook. The ribbon was added in Office 2007, but it couldn’t be customized in that version. But it can in Office 2010, 2013, and 2016.
How To Add Custom Tabs To The Ribbon
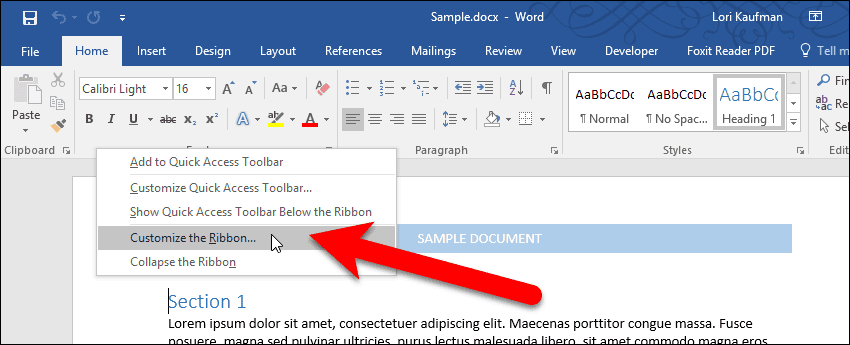
To add custom tabs, right-click anywhere on the ribbon and select “Customize the Ribbon” from the pop-up menu.
The “Word Options” dialog box displays. On the “Customize Ribbon” screen, the tabs available to add to the ribbon are listed in the right pane. To add a custom tab, click the “New Tab” button at the bottom of the list.
A “New Tab” is added to the list. To change the name of the tab, right-click on the “New Tab“, and select “Rename” from the pop-up menu.
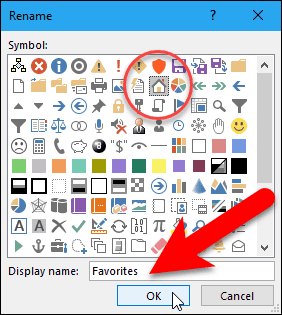
On the “Rename” dialog box, enter a name for the new tab in the “Display name” edit box, and then click the “OK” button.
Every tab must have at least one group on it. So, a “New Group” is automatically added to your new tab. To change the name of the group, right-click on “New Group“, and select “Rename” from the pop-up menu.
Enter a name for the new group in the “Display name” edit box on the “Rename” dialog box. You can also select an icon from the “Symbol” box. This icon will display when you make the Office program window smaller, and there is not enough room to display the name of the group. You can add multiple groups to a custom tab to categorize the commands on the tab. If you add a lot of groups to the tab, and you resize the program window, the chosen icons may display instead.
When you add a new custom tab to the ribbon, it is placed after the tab that was selected when you added the new tab. For example, we had the “Home” tab selected when we added our new custom tab, so our new tab was added to the right of the “Home” tab. However, you can change the order of the tabs. Say we want the new tab to display to the left of the “Home” tab. To accomplish that, we select the new tab, and then click the up arrow button to move the new tab above the “Home” tab.
Add Commands To a New Custom Tab
Now that we have our new tab with at least one group in it, let’s add some commands to that group on the tab. To view all the available commands, select “All Commands” from the “Choose commands from” drop-down list.
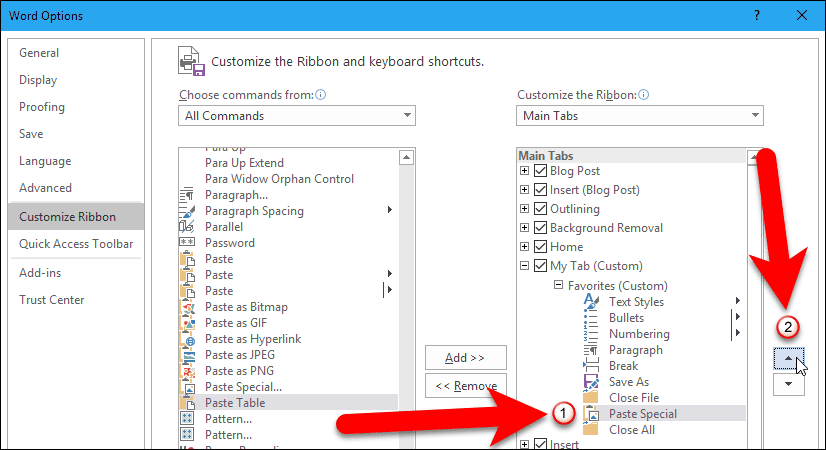
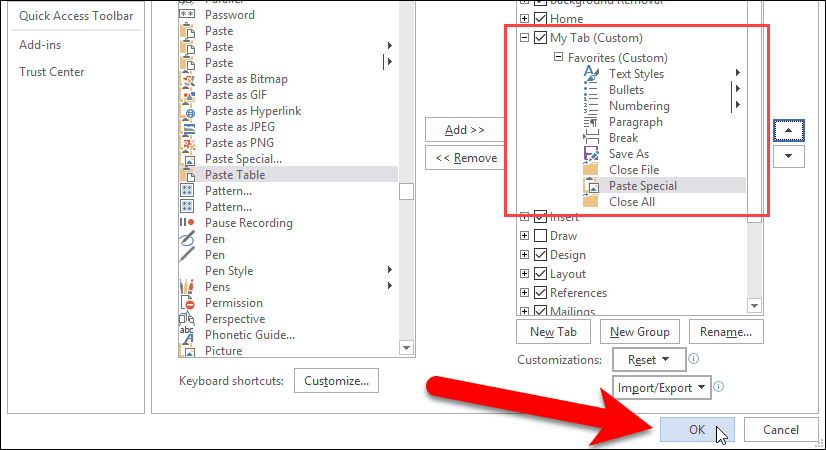
You must add commands to a group on a tab, not to the tab itself. So make sure the new group on the new tab is selected. Then scroll through the list of commands on the left, select the one you want to add to the group, and click the “Add” button. You can also drag a command from the list on the left to the group you want to add it to. When you see an underline on the group, release the mouse to add the command to that group.
Just as you can change the order of the tabs on the ribbon, you can also change the order of the commands in a group, and the groups on a tab. Use the up and down arrow buttons on the right to reorder commands and groups.
You can rename built-in tabs, like the Home tab, and change their order. But you cannot rename or reorder the commands in the built-in groups on the built-in tabs. Commands you cannot change are displayed in grey in the list of tabs on the right.
Add Commands To a Built-In Tab
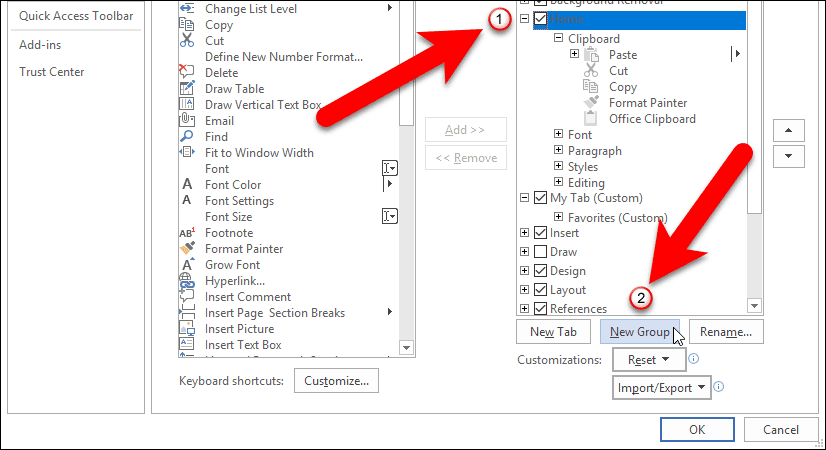
You can also add commands to a built-in tab, like the Home tab. However, you must add a new custom group to the tab first and then add commands to that group. Select the built-in tab you want to add a group to and click the “New Group” button below the list of tabs. Rename that group as we showed you earlier. Then you can add commands to the new group on the built-in tab, in the same way you can add commands to a new custom tab.
Click the “OK” button to accept your changes and close the “Word Options” dialog box.
Use Your New Custom Tab On The Ribbon
You’ll see your new tab on the ribbon in the order you added it. The group(s) and commands you added are available on the new custom tab.
Back Up Your Ribbon Customizations
You can back up all customizations you make to the ribbon. You can then import those customizations back into the Office programs if you have to reinstall Office, or if you need to install Office on another computer. To back up your customizations, right-click on the ribbon and select “Customize the Ribbon” from the pop-up menu. Then, select “Export all customizations” from the “Import/Export” drop-down list.
On the “File Save” dialog box, navigate to the location where you want to save your ribbon customizations. Then enter a name for the file in the “File name” edit box. Make sure you keep the “.exportedUI” extension. Click the “Save” button. You can copy this file to an external drive or a cloud service for storage.
Reset All Customizations On The Ribbon
To remove all the customizations from the ribbon, right-click on the ribbon and select “Customize the Ribbon” from the pop-up menu. On the “Word Options” dialog box, select “Reset all customizations” from the “Reset” drop-down list. To reset any built-in tabs you customized, select the tab you want to reset, and select “Reset only selected Ribbon tab” from the “Reset” drop-down list. This option is not available for custom tabs. You remove custom tabs instead of resetting them. We’ll show you how shortly.
A confirmation dialog box displays to make sure you want to reset all your customizations. Click the “Yes” button to remove all the custom tabs you’ve created and all changes to built-in tabs. NOTE: No confirmation dialog box displays when you select “Reset only selected Ribbon tab” from the “Reset” drop-down list. So be sure you want to reset all changes on the selected built-in tab.
To remove a custom tab you added to the ribbon, select the custom tab in the list of tabs on the right and then click the “Remove” button. NOTE: No confirmation dialog box displays when you remove a custom tab, either. So, be sure you want to remove the custom tab before you do so. If you’ve backed up your ribbon customizations, you can get the custom tab back, as we show in the next section.
Import Ribbon Customizations
To import saved customizations, right-click on the ribbon and select “Customize the Ribbon” from the pop-up menu. Select “Import customization file” from the “Import/Export” drop-down list.
On the “File Open” dialog box, navigate to the location where you saved or copied your ribbon customizations. This may be an external hard drive or a cloud service. Select the “.exportedUI” file and then click the “Open” button.
The following dialog box displays asking if you want to replace all existing customizations in the current Office program. If you’ve added new tabs and groups to the ribbon, these customizations will all be replaced with the ones you are importing. Click the “Yes” button if that’s what you want to do.
What kind of customizations have you made to the ribbon in Office? What commands do you find most useful? Let us know in the comments. Δ Contact Us :- trendblog.guest@gmail.com